Toy Train Layout Wiring - Switches, Page 2
| Basic | Intermediate | Advanced | Wire Management | Bus Wiring | 120V Train Room |
| Glossary | Wire Sizes | Switches | Load Calculations | Soldering | Troubleshooting |
Access Bridges used as Switches
(see Page 1,
Control Box and Track Trip)
(see Bridges Wired to
Control Track Power
with Relays for Engine Protection)
This method for powering bridge tracks and
keeping trains from running into the open hole has
proven infallible. Using bridge contacts instead of plugging in
bridge power is fast and user friendly.
The Lift Out Bridge is on the North end of the Lionel Lift Bridge.
Photos following the Circuit diagram show a variety of contact
solutions.
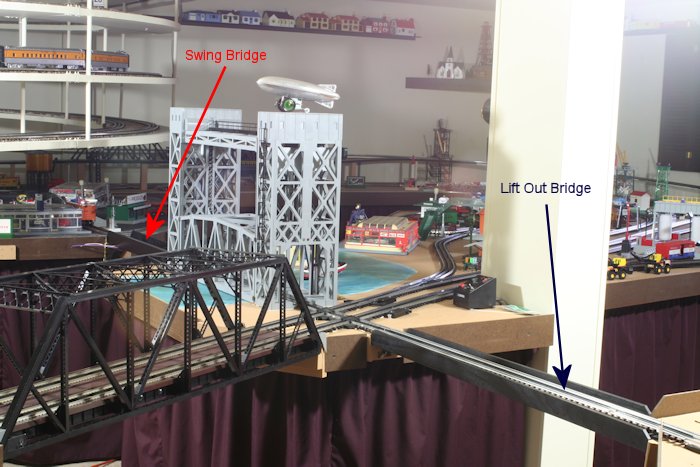
Two Bridges with 3 Sets of Switch
Contacts
The through track located just South of the Industrial Yard has its
power switched by the
Swing Bridge and Lift Out Bridge. If either bridge is out the
Switched Track Section is dead.

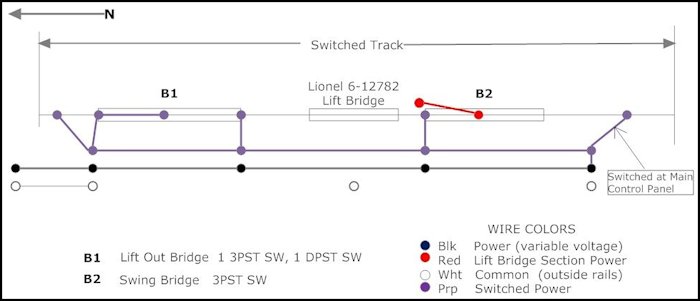
Circuit
Power is from Black Yard track and goes through bridges to south
table. The Purple is the
switched power and feeds center rails of the Switched Track Section.
The White/Common is fed
from the most convenient table. The Red wire feeds the swing
bridge because the Purple feed
from the south table track is switched as a siding on the
Main Control Panel.
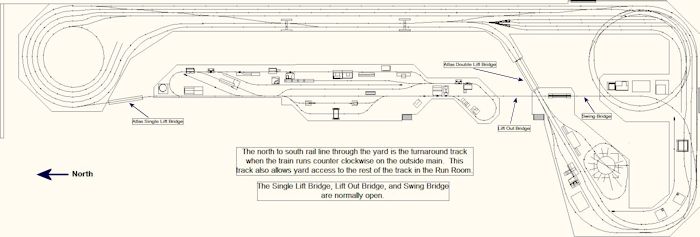
Run Room Showing the North South rail line through the Yard and South end.
Swing Bridge on South End
The white, black, and purple wires on the left are secured under the
bridge. They slide
into fascia holes when bridge is opened.
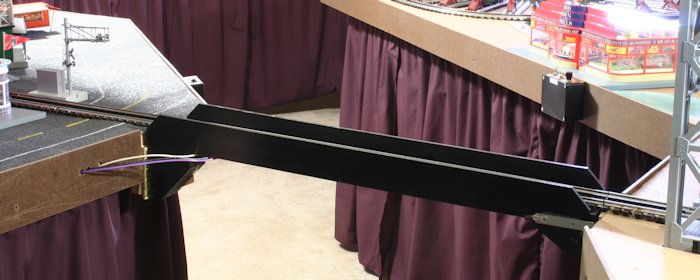
Swing Bridge Swivels on Door Hinge
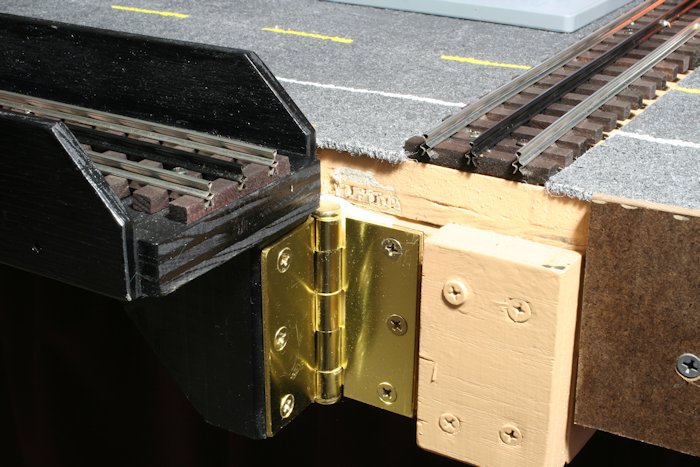
Bridge electrical contacts need liberal
tolerances to make good contact consistently.
Contact switches must be rated for voltage and amps used with
tracks.
My Run Room is dry in the winter and humid in the summer causing
significant contraction and
expansion in the tables. Winter causes gaps and summer causes
tight fits.
|
The Black wire
contact seen from the west side of the Swing Bridge is a magnetic cabinet door latch with a flexible copper strap over the magnet. 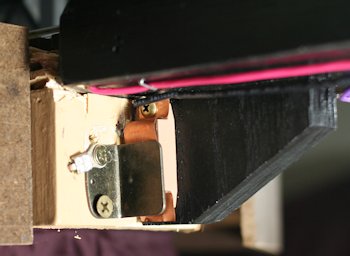 |
The Red wire
contact was a copper strip on both contact surfaces. The strip attached to the table required a loosely folded (springy) copper strip backing to improve electrical contact. The strip self destructed due to table expansion. 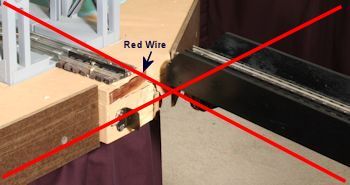 |
The Red Wire sliding contacts self destructed during the summer requiring a new contact.
Damaged Flexible
Strip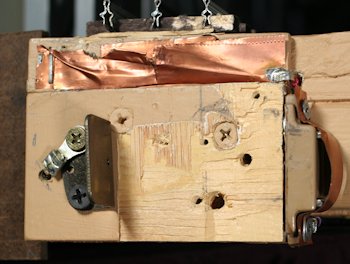 |
The 2 x 2 block
was added to mount the catch's contact plate. 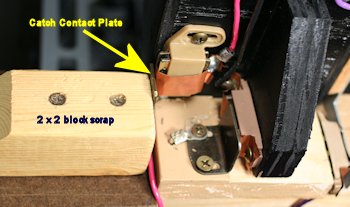 |
Ace Hardware currently has 17 Magnetic
Catches listed on their website.
A magnetic catch combined with a flexible copper strip works for
positive bridge contact.
| The first Purple
contact failed. The spacer wood strip on the side of the bridge was added for the L bracket to contact the magnetic portion of a cabinet latch. The Red wire contact strip was removed. 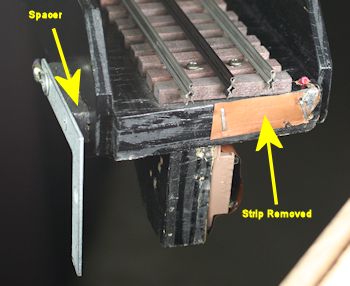 |
Purple Wire
Contact L Bracket to Magnet with Bridge Closed 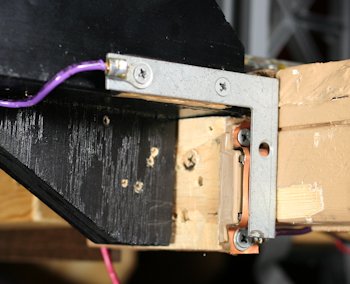 |
Bottom View of Current Swing Bridge
Contacts
Red and Purple Switches Replaced. Painter Arrival Pending.
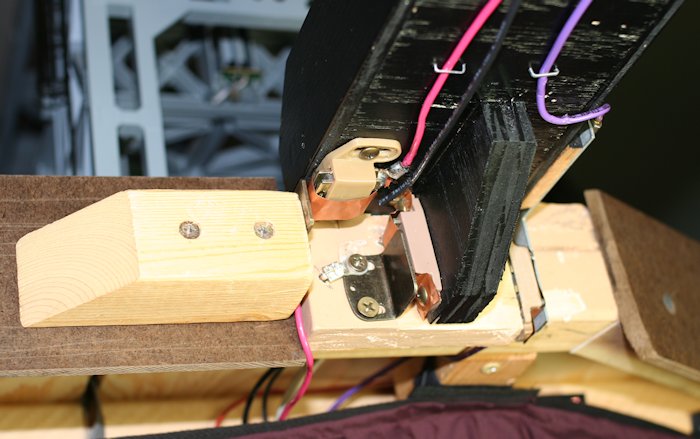
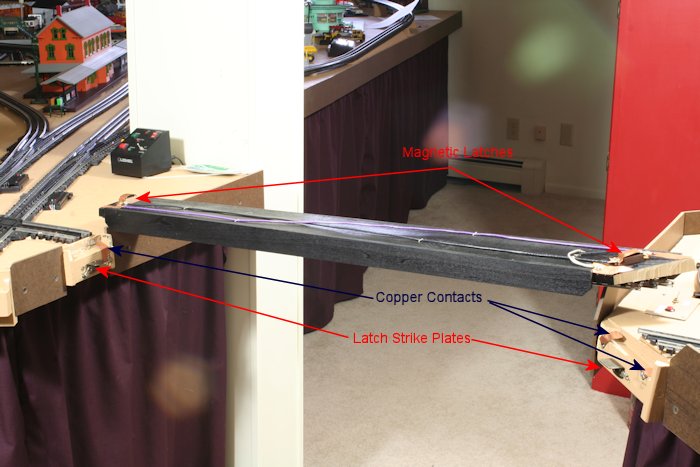
Swing Bridge with all Three Contacts
Before Red Wire Contact was Replaced.
The White (outside rails) for Track is fed From the Other End of Bridge.
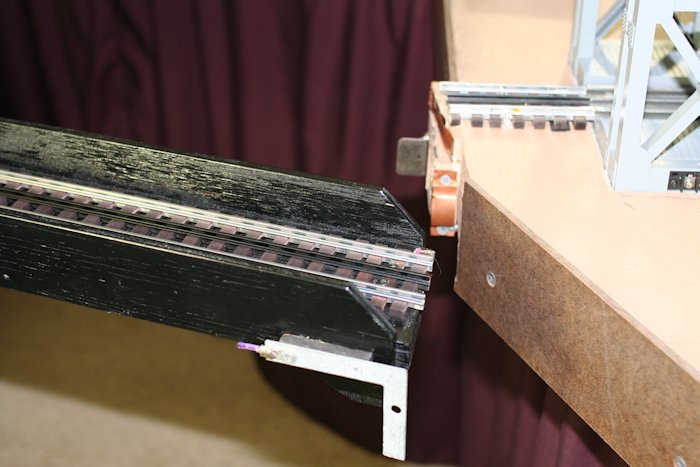
Bottom of Lift out Bridge
The left end has Black and Purple contacts. The right end has
Black, Purple, and White contacts.
The magnetic latches used with the strike plates help secure the
bridge during the dry winter.
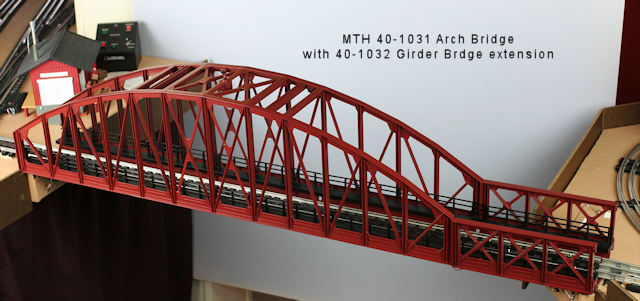
The Above Plywood Bridge was Replaced in 2022 with the MTH 40-1103
Arch Bridge.
See that installation and wiring at Runner and Guest Access Bridges.
| Question? Contact the SSPRR COO (Chief Operating Officer) using the email button to the right. (If email link is absent, please enable JavaScript.) |
|
Return to Switches, Page 1 or Return to 3 Rail O Gauge Toy Trains