3 Rail O Gauge Toy Trains
Layout Planning and Construction
Set Kids Up For Success
Children age 6 and under can be overwhelmed with a large Run Room full of trains and accessories. The youngest ones want to push trains, cars, and trucks on the floor. Older ones want to load and unload flat and boxcars with whatever fits. A track needs to be trouble free with easy rerailing when cars and engines derail. (Do cars and engines get kicked or shoved when we're not looking?)
| This "Dog Bone" built with surplus track loops from two RailKing sets sets kids up for failure. Back to back curves ask for derails. | Use the curves from one loop and add ten #40-1001 RealTrax - 10" Straight Sections. One straight is added to each end and four straights are added to each side. Thomas is much happier with straight tracks in the loop. |
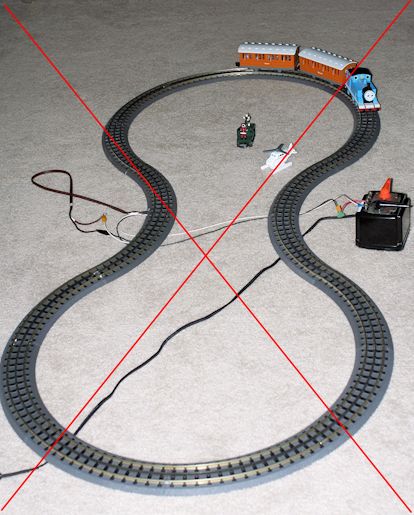 With the straight track added, derails are few and kids can rerail cars on the straight runs. |
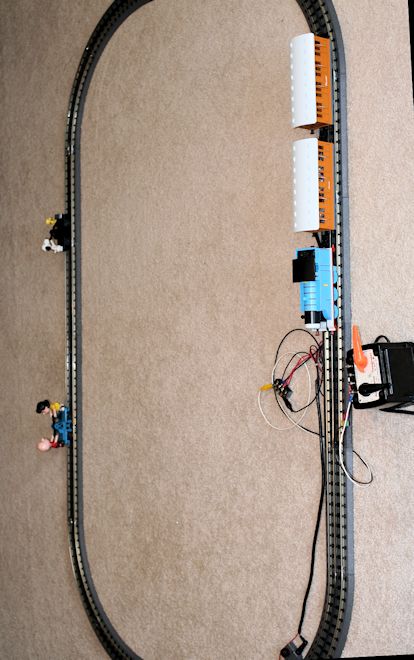 |
Track can be made up in two half loops to allow the half loops to be stored leaning against a wall. With the following installation, setup and tear down is quick and easy. Track will maintain excellent electrical contact under heavy use.
Each half loop needs at least two tracks with outside rails connected. Use insulated alligator clips with wire soldered to the clips.
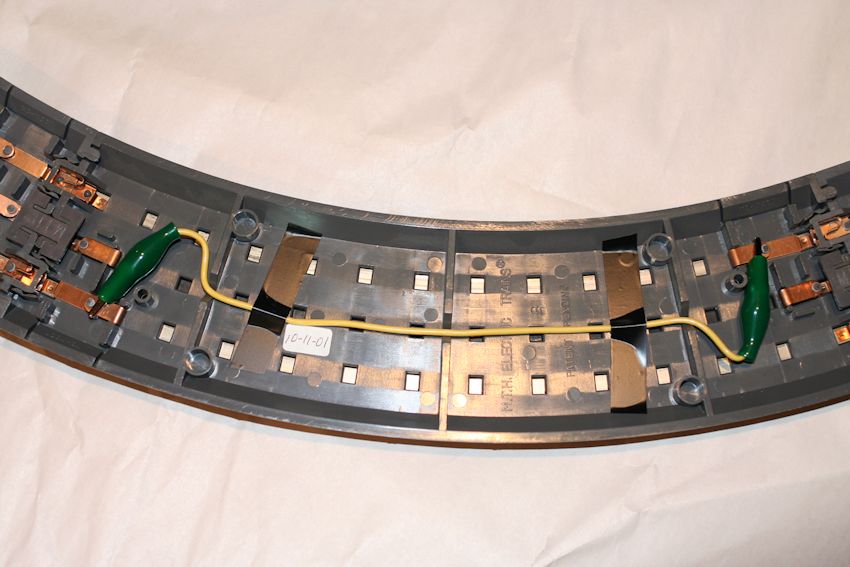
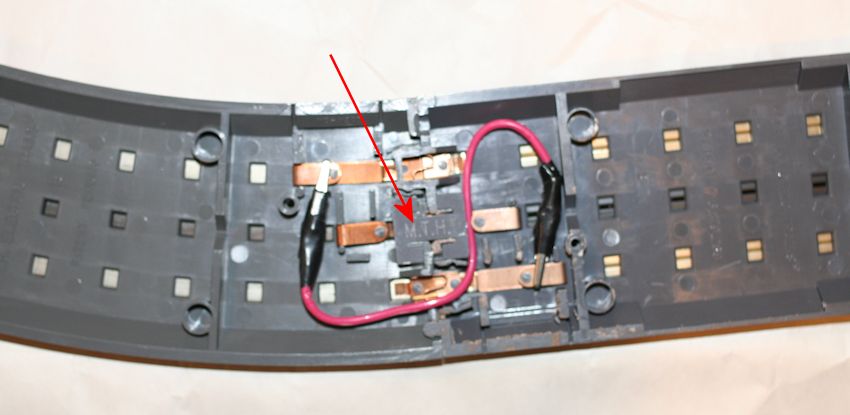
The red arrow above points to #40-1041 RealTrax - Track Clip. The plastic clips reinforce all the joints.
Permanent Electrical Contact at
Joints
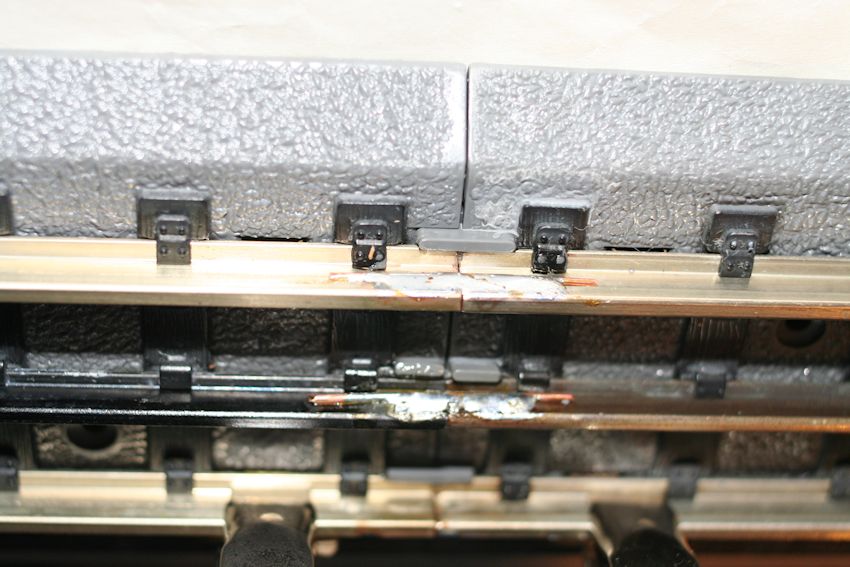
The RealTrax copper tabs to the track tended to work loose
causing low or no voltage to track. For permanent contact
solder #16 or #18 solid copper wire to clean track. The wire
is "tacked" on either side of the joints. If the copper tabs
come loose from the track where a lockon attaches, move the lockon
or wire the tabs to the track with solder.
After all plastic track clips are installed, flip complete loop ever onto a
smooth flat surface. Clean track and track side areas that will
be soldered with denatured alcohol. Mark the two center joints
of side straights so they aren't soldered. Use a Moto Tool
wire brush to prepare center rail sides for solder. (If the
track has grease the wire brush will just smear the grease.)
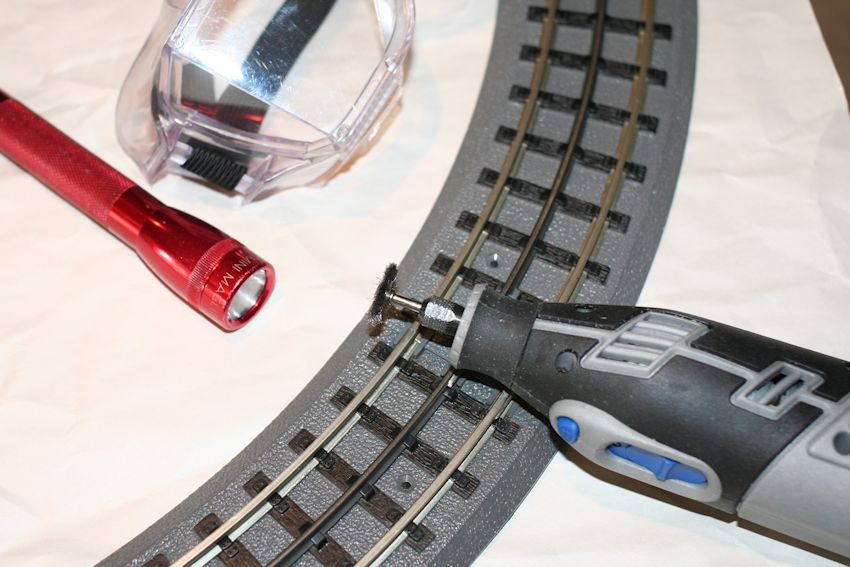
When soldering track use a 240/325 Watt Weller Soldering Gun or similar.
The bare metal of these spring clamps works as a Heat Sink to prevent excessive melting of the track base. The clips in the photo are about 1/2" wide and 2" long.
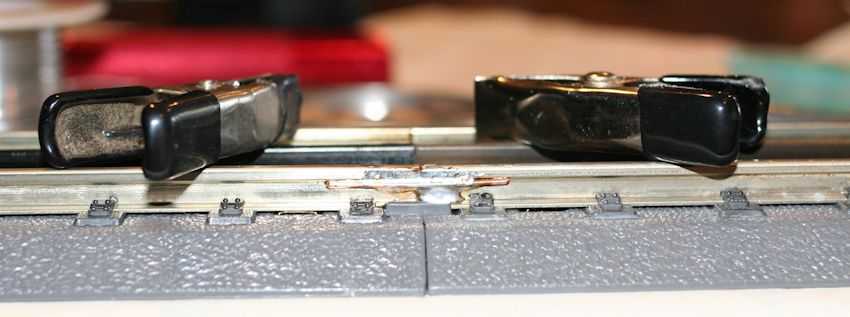
The hard wood strips to hold wire in place are 1/8" x 1/8" x 7/8" long. (probably cut from dollhouse lumber)
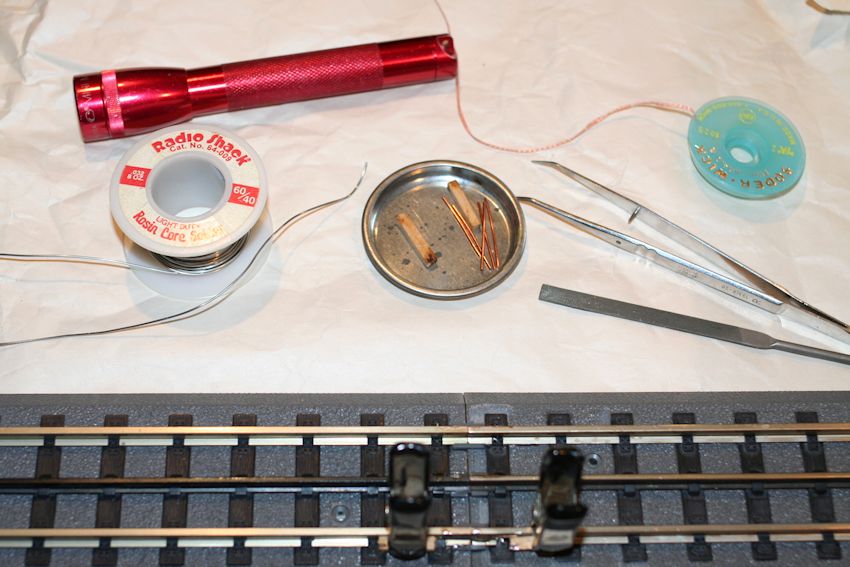
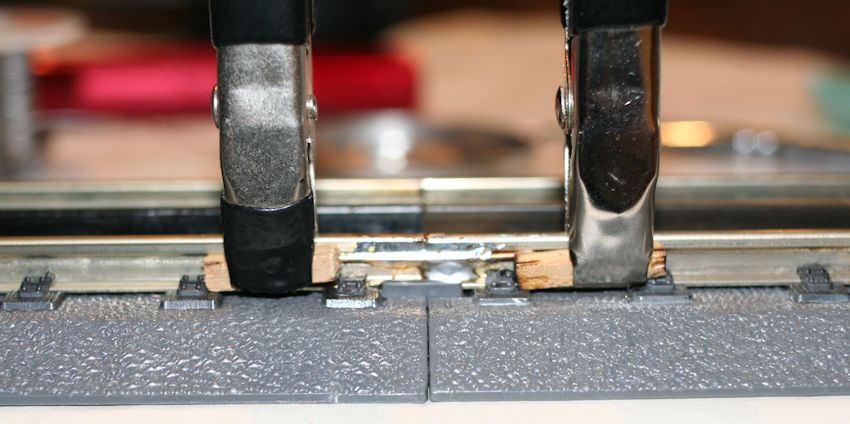
As you solder touch the gun to the track, not the wire. Use minimum amount of solder for each tack of wire to track. Work fast once track is hot or there's too much heat. Shiny solder indicates a good solder joint. See Toy Train Layout Wiring - Soldering.
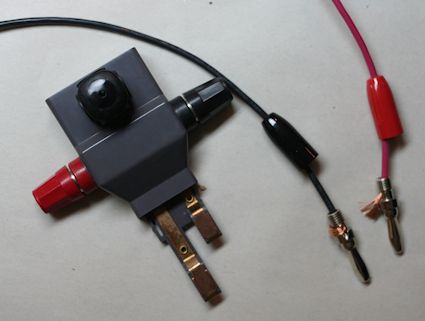
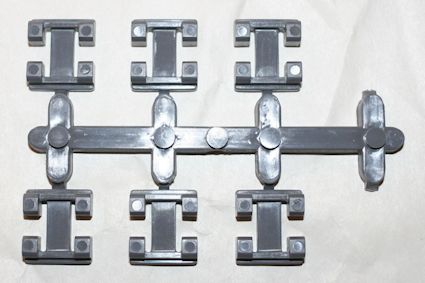
| Use one #40-1003 RealTrax Lighted Lockon for each half of loop. Assemble your own banana plugs or use #40-1015 RealTrax Wire Harness. | 40-1041 RealTrax
Track Clips (24) (sold as 3 sets of 8) |
 |
 |
Use whatever "kid friendly" power is
available. This is a Postwar Lionel 1033 90 Watt 5-16V
transformer.
The black handle is whistle and direction control. The red
handle is track variable voltage control.
The green arrow points to the 3A orange PTC installed in the
variable voltage feed for circuit protection. When there's a
short on the track, voltage to track shuts off. Power
must be turned off and short cleared to reset PTC.
For more information see Circuit
Protection using PTCs.
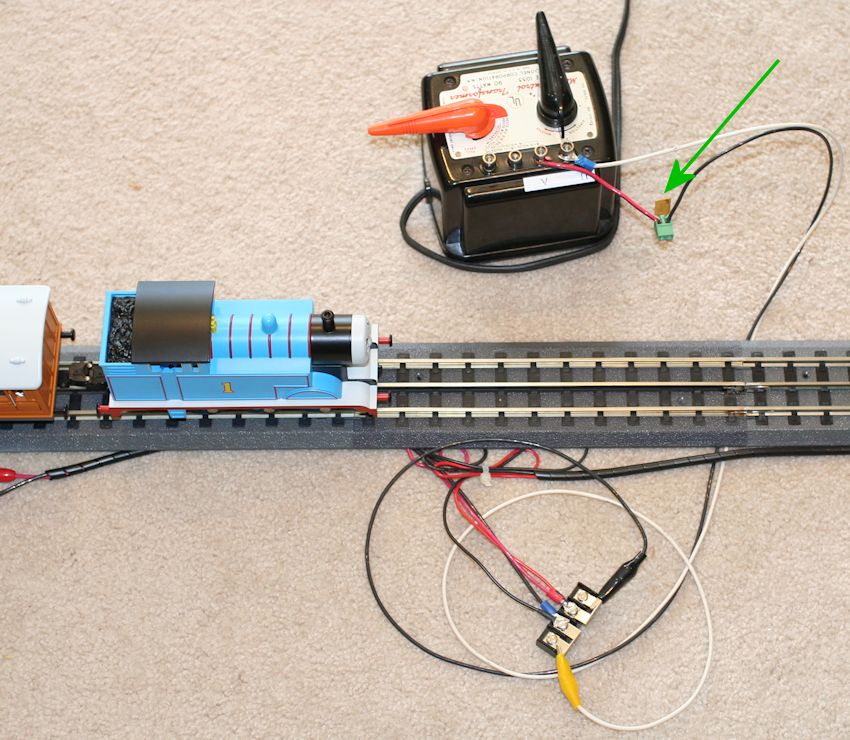
The terminal strip for the track connections can be covered with a sturdy plastic building.
Pack for Storage
Remove the two center plastic track clips. Unplug harnesses from
lockons. Remove transformer alligator clips. Pack parts
in plastic bag for storage with track loop halves. Reassembly is
quick and easy with no tools required.
This is a great track for kids if they get to choose their own engine.
Return to 3 Rail O Gauge Toy Trains
| Question? Contact the SSPRR COO (Chief Operating Officer) using the email button to the right. (If email link is absent, please enable JavaScript.) |
|
