Modifications to the Carousel Projector
Getting an Old Projector
The best projector is the probably the one you already own.
It is probably the cleanest and you know its history.
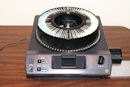
Old Kodak Carousel projectors can usually be found on
Craigslist,
eBay, or at local thrift shops. This project uses a Kodak Model
5600 Projector. The manual for this unit can be found on
Kodak's website.
 Modifying the Projector
Remove the following items from the projector:
- Original Lamp and lamp electrical connection to projector
- Lenses from lens housing (you will use this housing as stray light shield between the camera lens and projector)
- Built-In Viewer and drawer (obstructed camera bracket attachment)
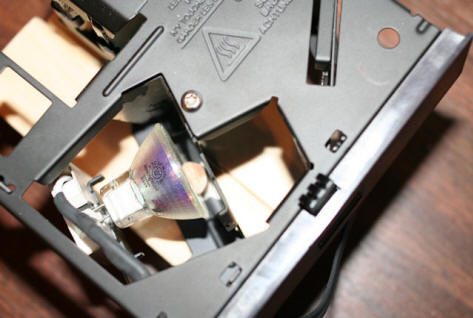
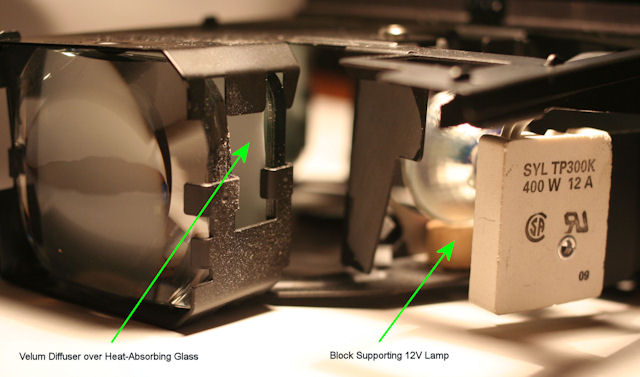
Projector Lamp, Condenser, Heat-Absorbing Glass, and Mirror
|
|
Power Supply and Lamp DrawerThe variable voltage power supply on the left is a toy train transformer, Lionel postwar Type 1033. |
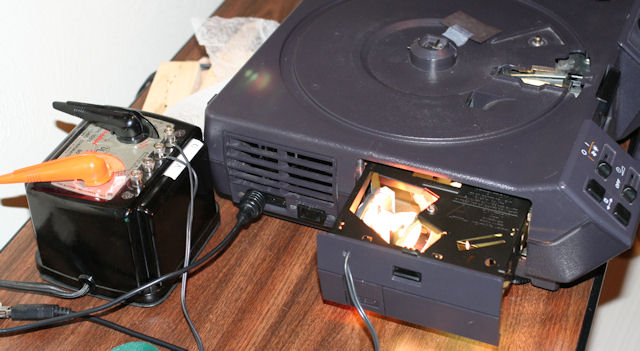
Lamp DrawerThe 12V lamp edge sits on a block cut to correct height from a dowel. The 12V Lamp is a smaller diameter than the original lamp. The 12V lamp electrical contacts will fit the projector's lamp socket if they are carefully bent. The lamp used is a 12V, 20W "Lensed Narrow Flood" halogen with GU4 base. Power the lamp with an external AC transformer. I used a variable voltage supply (train transformer) at 11V AC to drive the lamp. (It's nice to be able to vary the voltage. 12 volts was too bright.) |
|
|
|
Light AssemblyA Diffuser is needed between the Condenser and Heat-Absorbing Glass. I used drafting velum. Others have used semi-transparent white plastic. Left to Right - Condenser. Diffuser, Heat-Absorbing Glass, Mirror, 12V Lamp, and Original Socket |
Adding a Mount for the Camera
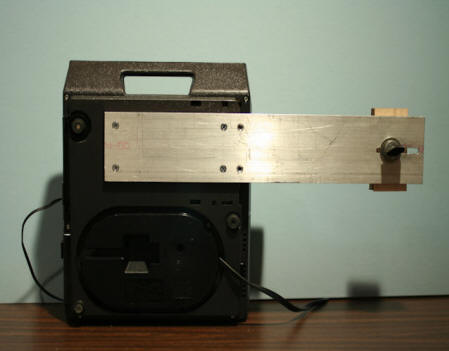
Camera BracketMy machinist buddy graciously volunteered to make the
camera bracket. The bracket is 1/4" x 3 1/4" x 18"
long aluminum (scrap). Remove the bottom from the
projector and mount bracket with 4 each 1/4-20 flat head machine screws with
fender washers and nuts on inside. |
|
Additional Information
Visit these pages for more information on setting up your slide converter: